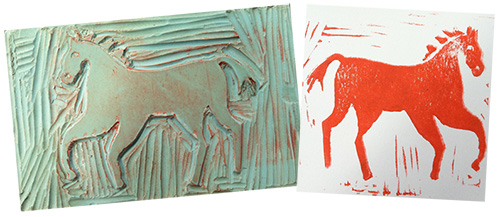
Basic Block Printing Lesson Plan
MATERIALS
 Linoleum Block: we used Speedball Speedy-Cut Easy Blocks (the blue one)
Image Transfer Tools:
- Soft graphite pencil
- Graphite transfer paper
- Permanent marker
Printing Ink:
- we used Akua Intaglio Ink — soy based/waterbased ink
- OR, use stamp pads
Brayer: we used Speedball brayer (soft) to roll ink onto plate
Inking plate (need smooth even surface): Palette paper
Linoleum Cutting Tools: we used Speedball Linozip cutters (to carve out the design) that are easier for young students – uses pulling motion vs. pushing
NOTE: tools are sharp – use at an angle and carve away from body if using a typical lino cutter
Baren or Burnisher: we used Speedball Baren or Burnisher (to press down block onto paper)
Paper: any student grade printmaking paper
Designs for print: the simpler the better (to begin with)
Cleaning supplies: Baby wipes (before and after) and soap and water
PREPARATION
- Cut paper to size for prints: 6”x9”
- Find designs to transfer or create your own design
PROCESS
- Design will need to be reversed or flipped — because the print is like a mirror or reflection — letters and words especially will need to be reversed to be readable on the print
- Transfer design onto your block by 1) Graphite pencil rubbing or 2) Put a piece of Graphite paper between your sketch and the block and trace your sketch and 3) Experiment with tools before carving final design
- First, use the finest tools to cut the outline of design — use larger cutters to remove excess
- Scoop out the ink with a palette knife and place onto palette paper or inking plate 1) Line of ink should be the same length as brayer, 2) Roll out the ink evenly and it should make a tacky, zippy sound with an orange peel texture when it's ready to be used
- Place your block onto a clean surface 1) Hold the block securely and roll ink out evenly in one direction, 2) Apply a couple of coats. NOTES: Stamp pads are great for small designs. Make sure hands and working surface are clean!
- Take the printing paper and gently set on top of the inked block — hold paper in place with hand
- Rub evenly in a circular motion with the baren or burnisher over the entire piece
- Gently lift the paper away from the printing block from one end of the paper to check ink density. Set back down and burnish again if it's not dark enough
- Hang to dry
- Don’t forget to sign your artwork!
QUESTIONS?
DENVER: 303.698.3838 | 800.950.ARTS [2787] COLORADO SPRINGS: 719.578.8070 or Ask Us Anything>
