Ukrainian Egg Decorating
 The Art of Pysanka
History
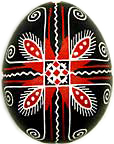
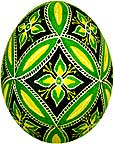
How to Decorate Beautiful Ukrainian Easter Eggs (Pysanky)Pysanky are Ukrainian Easter Eggs, decorated using beeswax and dyes that are applied in layers.
The paragraph below is an excerpt from How to Decorate Beautiful Ukrainian Easter Eggs "Pysanky" by Luba Perchyshyn. This pamphlet is available from our online store.
Ukrainian Easter Egg Decorating has been handed down through generations of the Ukrainian people. They are famous the world over for their colorful Easter Eggs (Pysanky). People decorated eggs believing that great powers were embodied in the egg. Legend has it that as long as pysanky are decorated, goodness will prevail over evil throughout the world.
The Process
Melted wax is applied to the eggshell. This hot beeswax will harden almost instantly. The beeswax covers and seals the shell where the wax has been applied. A special tool called a kistka is needed to heat and apply the beeswax.
Starting with the white eggshell, apply melted beeswax wherever you want white on the completed design. The beeswax seals the color underneath it. The next step is to dye the egg with the first color. The entire shell will change color, except underneath the beeswax. That part of the egg will remain white. As a rule, the sequence of colors are dyed from lightest to darkest color, so the first dye used can be yellow. Now, cover whatever part of your design that is dyed yellow with melted beeswax. Dye the egg again into the next color, usually orange. Apply more beeswax. Dye the shell again. Repeat a few more times until you have finished layering all the colors of your design.

Customarily, no more than 5 colors are used on a pysanka. Too many colors will affect the brilliance of the individual dyes. Many colors are of the same hue and therefore not compatible on the same egg. Time and practice will teach reliable color sequences. There are several excellent books available with step by step designs. Following these steps takes the guessing out of dye sequences. These books are a good way to start out.
Wax is not applied to the final color. When the shell has completely dried from its final dye bath, the beeswax will be removed. There are several methods to removing beeswax from the shell, but the oldest way is still the most magical. Place a section of the egg along the side of a candle flame. When that section becomes shiny, remove the shell from the heat and wipe clean with a tissue. Continue until all of the beeswax is removed.
Oil based varnish or polyurethane wood finish can be applied to the shell upon completion to give it a beautiful gloss.

